A Day in the Life Too... a blog about modest style

A 30-something mom's blog about modest style, DIY stuff, and limiting dessert. Just kidding. We eat dessert first around here.

** Check out this post for an awesome way to build a totally customized, modest wedding gown...and save 10% with coupon code! **
Showing posts with label decorate on the cheap. Show all posts

Sunday, December 30, 2012

Ombre + Ruching + DIY = Colorful Bliss

If you love ombre, and you love ruching, you just might love this little DIY project I did this month...either for yourself or the favorite little girls in your life.
 
 
That's right. An ombred ruched duvet cover...out of a plain ol' cheap ol' Walmart flat sheet. I don't think it gets cuter than this. Really.
 
Come on over and check it out!

Monday, October 1, 2012

Brains & Their Juices....or Hey, Nice To See You

You guys... You all know me well enough by now that I don't mind you rolling your eyes at me. In fact, most of the time I'll beat you to it.
 
But some seriously great stuff is happening in my brain lately. And it's called: Creative Juices Are Flowing.
 
 
And, although they're not as good as Minute Maid 5-calorie Lemonade juices (that stuff is delicious), these creative juices are making me both happy AND productive. So.
 
Red rover red rover,


Tuesday, February 28, 2012

HomeStyle: Fabric-backed Kitchen Cupboards

You guys, I have a sickness. And it's called "I can't stop doing stuff in my house." Now, this wouldn't be a problem if it was useful stuff, like laundry and vacuuming and cooking. However (and unfortunately for my family who happens to enjoy a delicious dinner or two), it usually involves messes spread over all available surfaces and lots of paint.

This project was on the smaller scale (much to everyone's relief) but it just might rank among my favorites thus far. Inspired by this post, and because my one open cabinet was woefully dark and overstuffed and lame, annnnnnd because it's visible right when you walk into the front door, I decided to amp up the style factor and tackle the fabric-backed cupboard for a fresh new look.


Actually, I had attempted face-lifting this particular cupboard recently in the past, but I chose paint that was the total wrong color and I then filled the dang thing too full of random dishes so it looked, in a word, stupid. (You know it's serious when I use the "S-word," which is a pretty big no-no around here.)

For $2.50, I bought a piece of foam board at WallyWorld, cut it to size, and pretty much followed the tutorial I linked to above. Fortunately, I had some fabric left over from this project that would work in the kitchen, so I used that.

Then I edited my already meager collection of displayable dishware because I'm trying to embrace the adage "less is more." (I believe this in many instances, but it's often hard for me to narrow things down. Which is why my posts, like this one, are wordier than necessary. Heh.)


It's a work in progress (my whole house is, frankly, and I'm loving it!), but it's a start. And it took about 30 minutes to do and clean up. Which means there's room on the countertops to make dinner and chocolate cake, nearly half of which I may or may not have consumed already.


My husband's reaction to the cupboard: "Wow. Fancy." No exclamation points (he's not one to become weepy over, say, a photo of someone's beautiful interior like I am), but he likes it. Phew.

Happy Tuesday.

Monday, February 27, 2012

HomeStyle: Vintage Button Art

Inspired by this post (and every other post on her blog, let's be honest) and having been given many vintage buttons from my mom (and my MIL's having a fine collection useful for filling in the color gaps), I decided to make a piece of vintage button art for the nursery.

 I had an old, ugly frame with an old, ugly rooster pic attached directly to it. Perfect. After a quick spray painting and light distressing of the frame, it was ready to go.

My kids helped me pick out the buttons. Since it was going into the nursery, my girls thought the baby would most appreciate a rainbow formation. Easy enough. I spray-adhesed (awesome verb) some old burlappy cotton fabric over the ugly rooster art and, after spreading out all the buttons on the floor to get the layout right, I began gluing them to the framed fabric.

To me, few things beat heirloom buttons. So much diversity and strangeness and awesomeness in the buttons' design and colors.


I did add some contrasting thread to some of the simpler buttons, just for interest... and because I'm addicted to pairing red with aqua these days.


I really like how it turned out. I can sit and study this thing for a long time, because the buttons themselves are so interesting individually and collectively. And I like the textural contrast of the organic cotton fabric.

Overall, I think it's perfect art for a nursery corner where, let's face it, many hours upon hours are going to be spent. Plus, total cost: $free$. Sweetness.


Happy Monday!

Monday, February 6, 2012

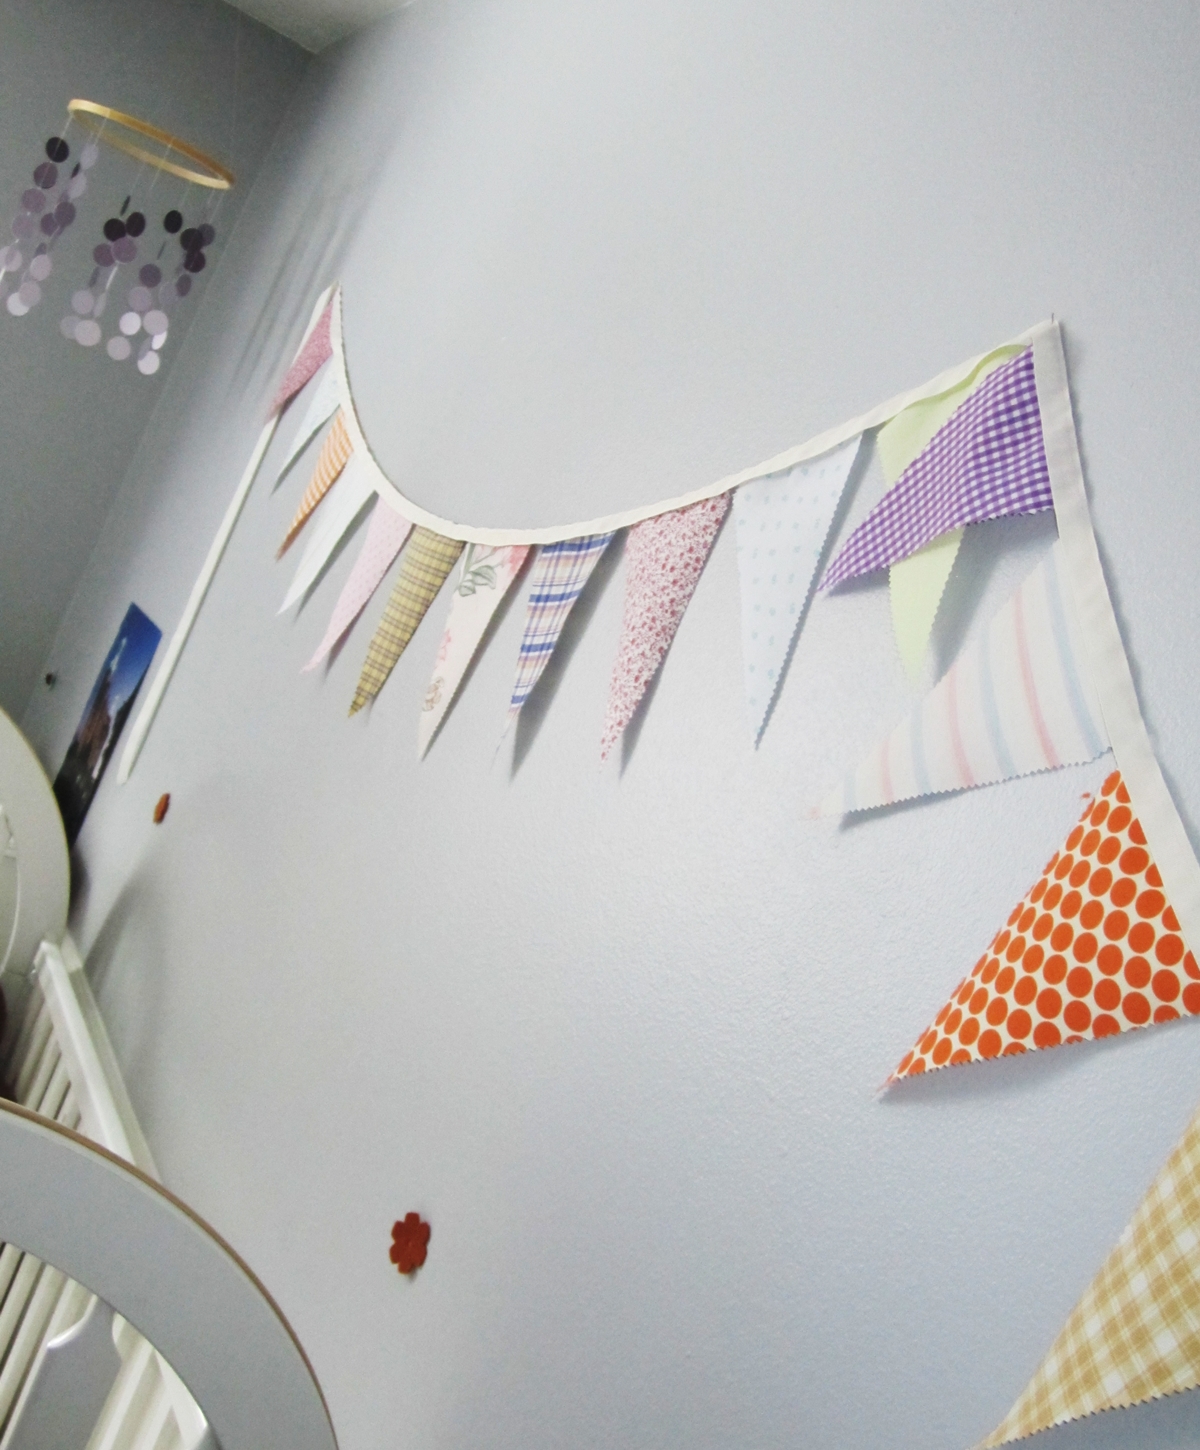
stylish nursery on the cheap: sweet fabric bunting

(See this post about my quest to create a sweet, airy nursery for this coming baby.)

Have you guys seen fabric bunting, garland, flags, whatever you want to call them all over the cyberwaves lately? Me too. All different colors and sizes. I'm loving the insta-festivity they add to a space without going over-the-top, particularly in kids' bedrooms and/or playrooms.

As a girl who likes to dabble in sewing, I have a few fabric scraps and remnants on-hand, so I thought this project would be right up my alley (translation: cute. and also: cheap). Because I still haven't exactly figured out the color scheme for the nursery, I decided to keep the flags feminine and fairly light but also diverse.


I made up my triangle pattern and cut out a bunch of scraps in that shape. Then I used the pattern to also cut out triangle iron-on interfacing and ironed them together. This will make each flag hang much more nicely than an un-lined piece of fabric. (This also made it possible to NOT have to sew the edges of each triangle; however, if I were making a two-sided bunting I would've bypassed the interfacing step.)


After interfacing was attached to each triangle, I trimmed all edges with pinking shears and sewed 'em right onto a stream of grosgrain ribbon (I imagine you could even use fabric glue for that step to create yo'self a completely-no-sew project). I couldn't love how this turned out any more than I do. It adds visual interest to almost a whole wall and brings in some great color. (Recognize that circle paint chip mobile?)


Plus, hello, free. Yeehaw. Does anyone else find their creativity juices enhanced by budget constraints? This is becoming highly addictive and fun for me.

Once again: my older girls want one of these in their room. I'm sensing a trend here...

Happy Monday.

p.s. Check out great weekend blog reading at Serenity Now.

Saturday, February 4, 2012

super easy valentine decor activity

Raise your hand if you love surfing the cyberwaves for inspiration and good ideas.

(Forgive me if the going is slow from here on out...hard to type with just one hand...)

Raise your other hand if doing so, on occasion, gets you a little discouraged with the overload of possibilities and, consequently, you end up doing nothing. Nothing at all 'cept heading to the fridge for something cold and delicious. Like pudding. Mmmmm...pudding...

Actually, put your hands down; that's just getting awkward for everybody.


Enter: the Super Awesome Hanging Valentine Window Craft (patent pending), guaranteed to underwhelm. Takes 20 minutes, is completely free, and rocks the neighborhood.* 

Step 1: Draw hearts and/or other Valentine-y stuff on flattened coffee filters (we also use the filters for disposable popcorn bowls for family movie nights).

Step 2: Let your kids color said hearts until you have enough. We did 20.


Step 3: Tape colored coffee filters onto fishing line or floss or some smallish thread that's been pre-cut to run the height of your window.


Step 4: Tape the top of your line onto the top of your window moulding. (Tip: Using painter's tape makes husbands happy.)


Step 5: Tape the bottom of the line under the windowsill.


Step 6: Repeat for as many strands as you have.


Annnnnd...you're done. Easiest project ever.


Happy Valentine's Day season. Are you feeling underwhelmed yet? Good. Then my job here is done.


*Disclaimer: I use the terms "rocks" and "neighborhood" verrrrry loosely. And by "loosely" I of course mean "not necessarily true." Which also translates to "total lie." 

Happy Saturday. 
Related Posts Plugin for WordPress, Blogger...
Pin It button on image hover